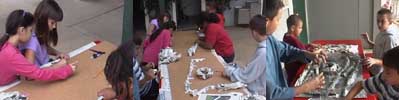
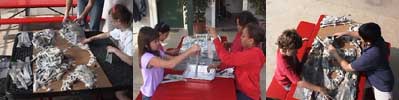
Creating the Landscape
 |
 |
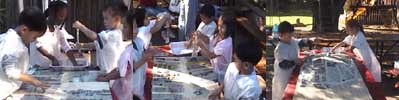 |
The best part of creating the landscapes for many of the students (and their teachers too!) is how sticky the starch gets and how fun it is to "get messy". Starch washes out, but it is probably a good idea to work outside covering clothing with an old shirt or apron.
Click on each of the above panels, or on "continue" below, to read a description of the creation process and the materials required for the project.
Note: Do not allow the boards to dry in the sunlight. If it dries too fast the papier mâché will shrink away from the board. If this happens, you can repair it with additional masking tape or papier mâché before continuing to the next step.
After the landscapes dried, students checked for any areas that were lifting or otherwise needed repairs and applied masking tape or more papier mâché to the problem areas.
Materials Required for Landscape Activity:
| Qty. | Item |
| 4 | 2-foot by 4-foot sheets of plywood (suggested thickness 3/8 inch) |
| 4 | 2-quart jugs of liquid starch |
| 1 | gallon jug of white glue (may need a little more) |
| newspaper (some cut into strips approximately 2-inch by 11-inch) | |
| tempera paint (Mars colors such as brown and red) | |
| clean sand (use the type designed for children’s sandboxes) | |
| 4 | containers for dipping paper strips and for painting (disposable aluminum baking pans approximately 8"x11"x2" work very well) |
| paint brushes | |
| plastic for covering work area | |
| painting smocks or old shirts to wear while working |
| Home | Contact Us | Credits | Sitemap |
© 2003 - Imagiverse Educational Consortium

